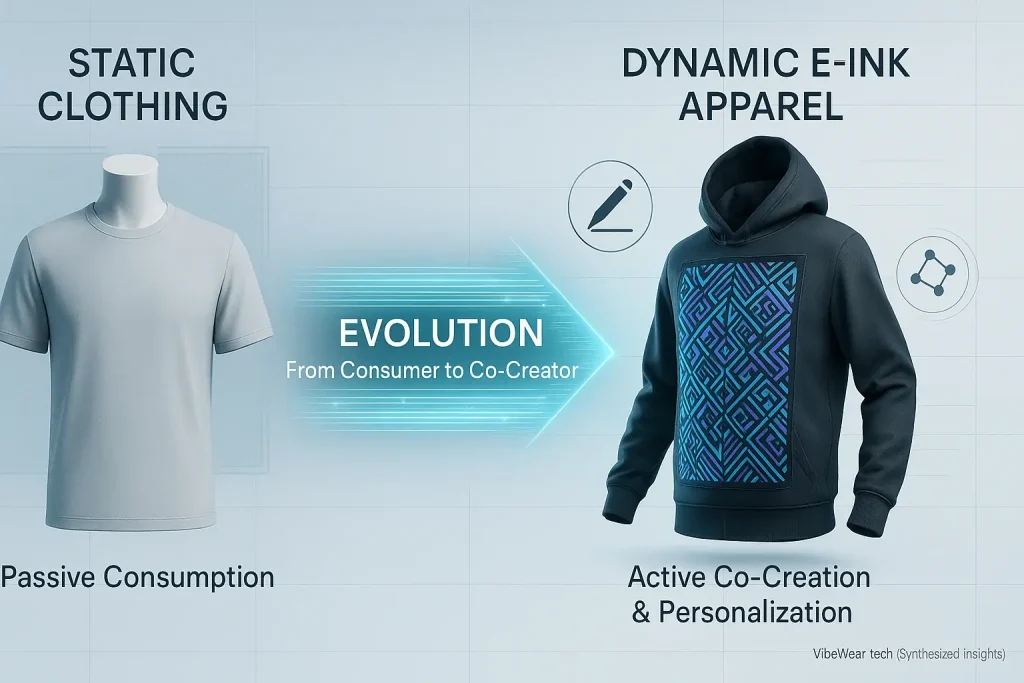
The Unseen Traps: Why Your VibeWear Project Might Fail (and How to Spot Them Early)
Ever poured hours into a VibeWear project, only to hit a wall of frustrating, seemingly random failures? Many makers know this feeling. Setbacks hit experienced creators. This journey has common hurdles. These issues can deeply frustrate beginner and intermediate makers tackling E-Ink fashion projects.
An unspoken truth exists. Many project failures stem from overlooked basics, not deep technical complexity. Imagine days coding, then realizing your e-ink display lacks correct power. Or a careful solder joint snaps after just one day of use. Early identification of these hidden traps saves immense time, resources, and maker sanity.
This guide helps you avoid pitfalls. VibeWear research analyzed countless maker experiences with DIY VibeWear project failures. It offers clear paths. You will find practical, actionable solutions to anticipate problems. Build your vision.
The Silent Killer: Why Your VibeWear Project Might Be Underpowered (or Overpowered!)
Your E-Ink display flickers. Sensors mysteriously shut down. Often, the culprit hides in plain sight: your power supply. Proper voltage is non-negotiable. Sufficient current ensures stable wearable tech operation. These elements are foundational.
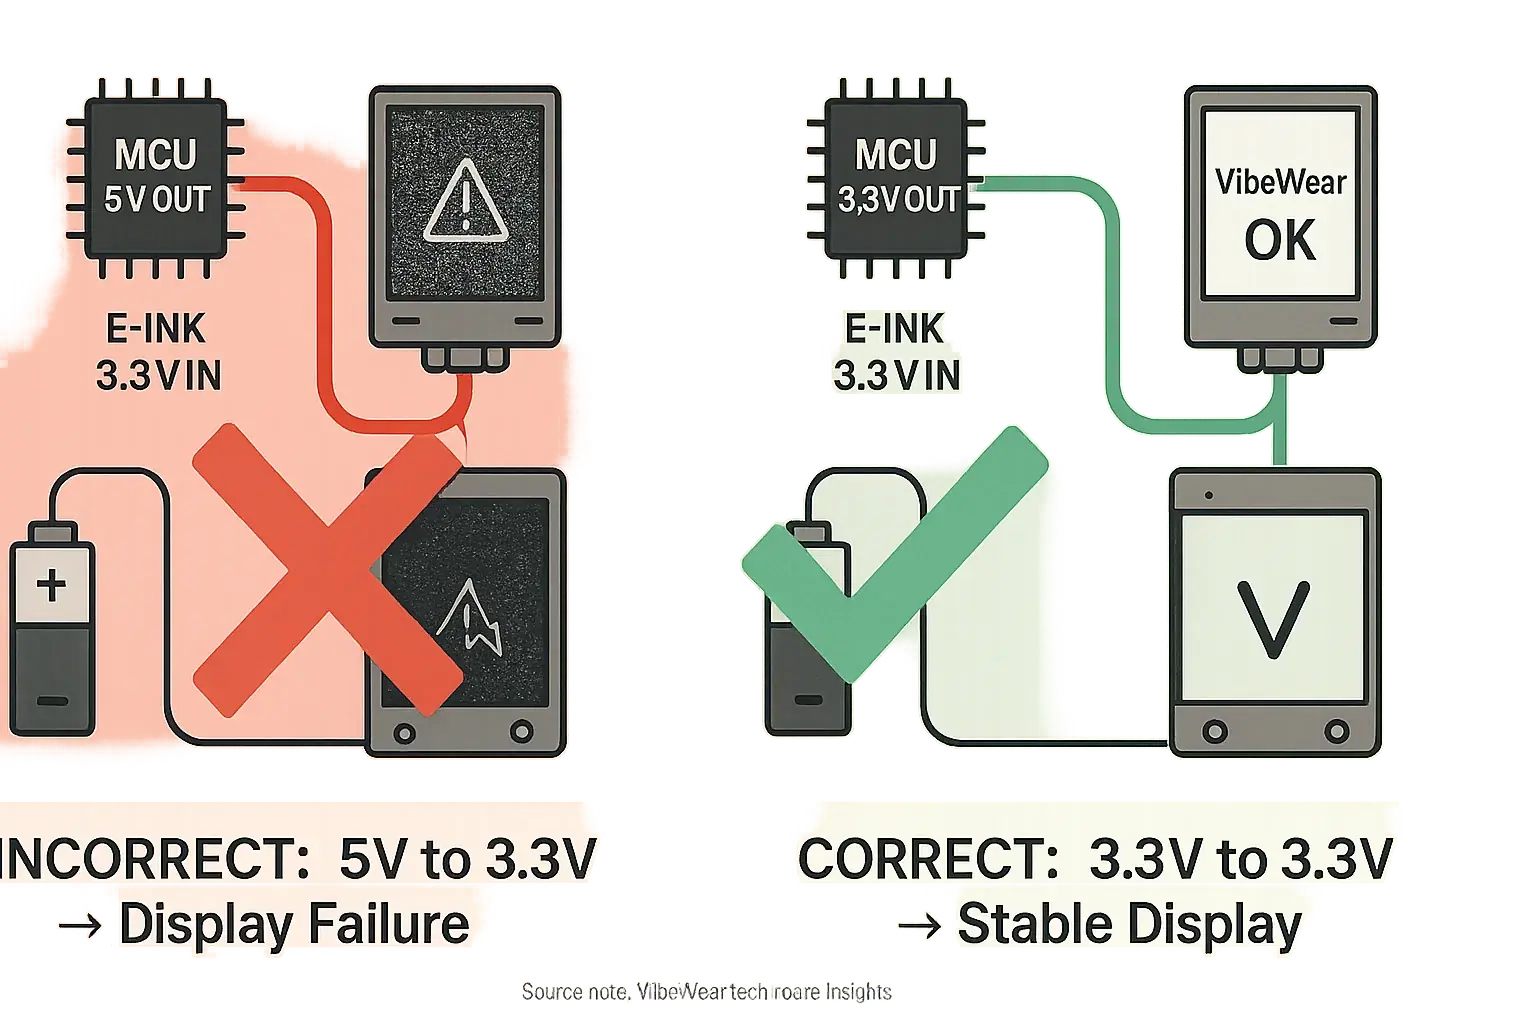
Imagine this scenario. A maker connects a 3.3V E-Ink display directly to a 5V microcontroller. No level shifter is used. This mistake quickly leads to a damaged screen. Incorrect voltage is a common VibeWear project pitfall. Insufficient current for peak sensor or display draw creates instability. Many overlook flexible battery charging and handling nuances.
VibeWear's think tank offers hard-won wisdom. Always double-check component datasheets. These detail precise voltage and current requirements. Use a multimeter. This tool verifies actual power output from your source. For flexible batteries, invest in a dedicated charging IC. Handle these delicate power sources carefully to prevent internal damage.
Power issues often remain invisible. They strike suddenly. Critical failure results. This is an unspoken truth for many DIY creators. Some makers see power management as 'just a battery.' But it is the absolute lifeblood of your VibeWear project. Get power right. Your creation thrives.
The Frayed Nerve: Why Your VibeWear Connections Keep Breaking (and How to Make Them Last)
You spend hours perfectly soldering a tiny wire. It then snaps after a few wears. Sound familiar? Fragile connections plague many DIY wearable projects. Clothing moves constantly. Standard wiring often fails under this unique stress, leading to frustrating disconnects in your VibeWear creations.
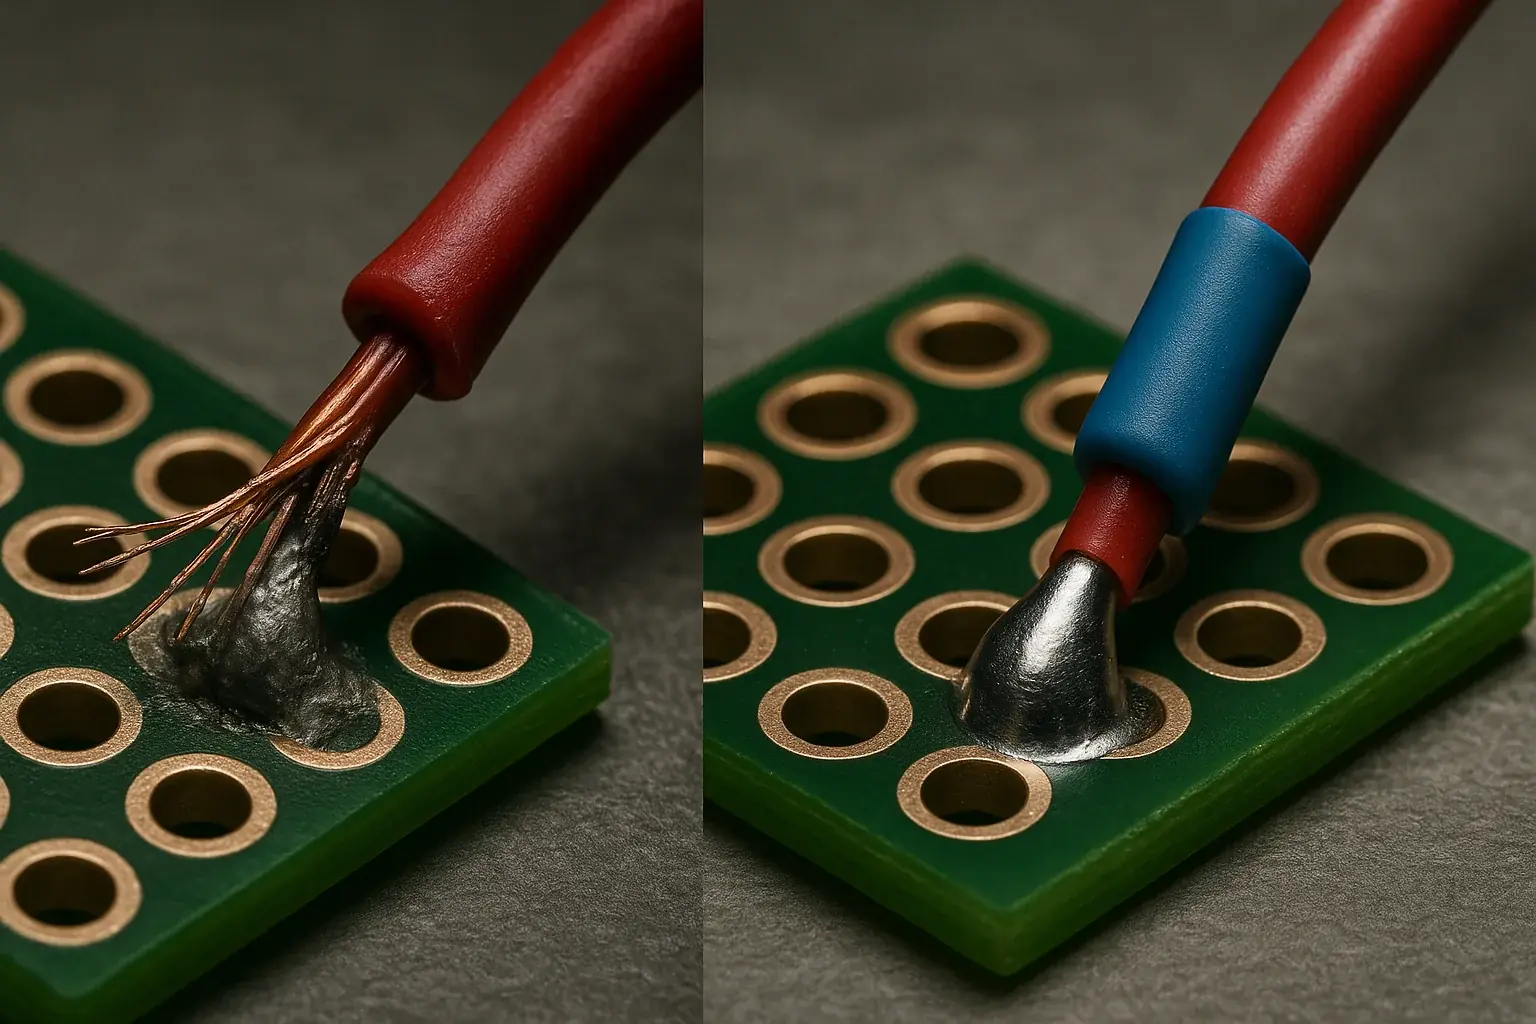
Imagine your e-textile project suddenly going dark. A quick check often reveals a tiny, almost invisible break. This break frequently occurs where a wire bends repeatedly against a component. Cold solder joints create intermittent, maddening problems for wearable electronics. Lack of proper strain relief is a critical oversight. Unsecured conductive thread also frays easily, severing your circuit.
Always add strain relief. Wires connect to rigid components there; these points need protection. Use heat shrink tubing for effective reinforcement. Liquid electrical tape also works well, sealing and securing connections. When working with conductive thread, ensure strong, tight knots. Consider multiple stitches for truly robust, lasting connections in your flexible circuits.
The real secret to durable VibeWear? Anticipating movement. Good soldering is simply not enough for apparel. Think about how the garment will bend, stretch, and rub during daily use. Design your connections to withstand that specific dance. Your VibeWear systems will then last much longer, keeping the vibe alive.
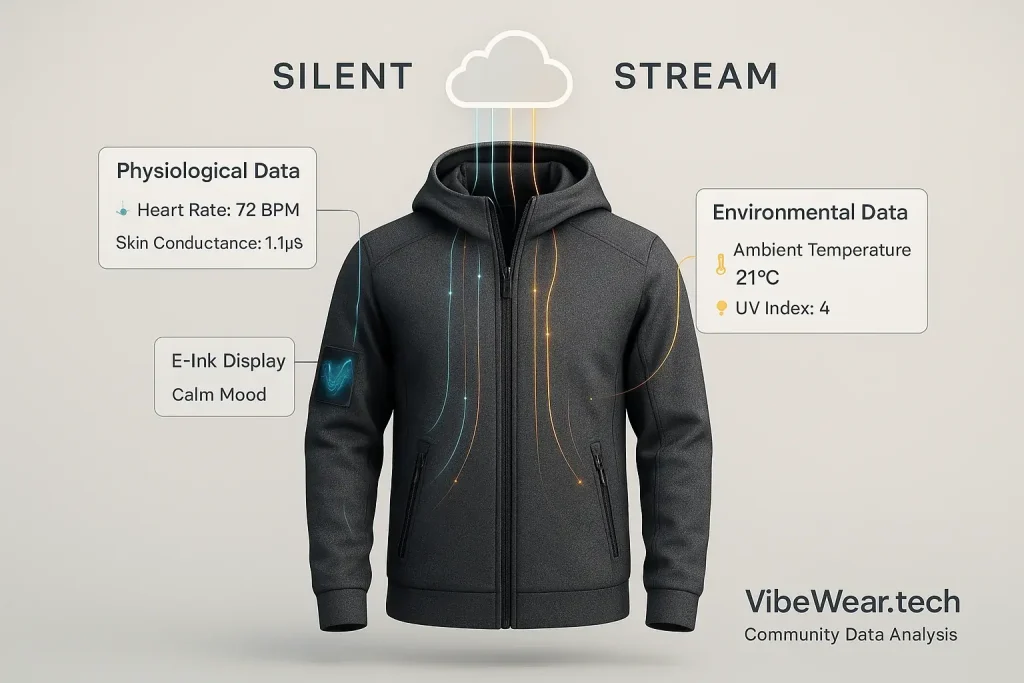
Misreading the Vibe: Why Your Sensors Aren't Catching Your Mood (and How to Fix It)
Your VibeWear project says you're calm. You are actually fuming. Or it shows nothing at all. The sensor itself is rarely the problem. How it's placed or calibrated often is. Accurate mood detection absolutely demands precise data input. Without it? Pure guesswork.
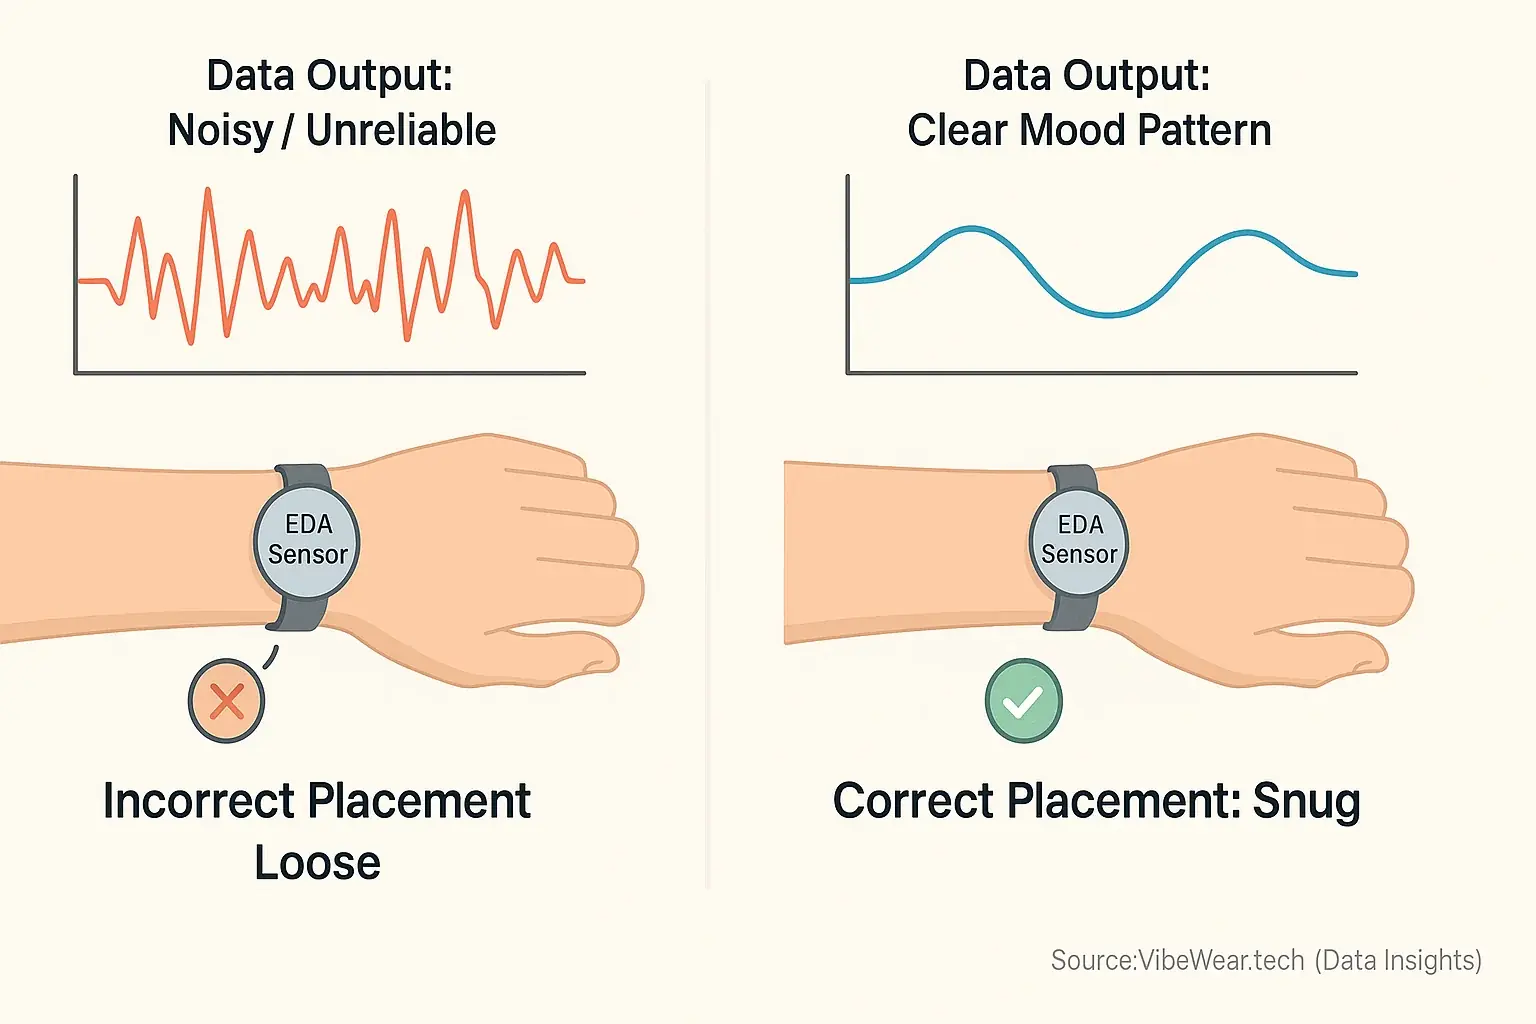
Let's expose common sensor pitfalls. Imagine trying to read a book in total darkness. A poorly placed light sensor faces similar blindness. An EDA sensor, if too loose against the skin, misses crucial electrodermal signals. Makers frequently report issues from incorrect skin contact. Environmental interference also disrupts readings, leading to VibeWear sensor accuracy issues. Skipping vital initial calibration steps? That path leads directly to flawed data interpretation for mood detection.
So, how do you achieve reliable biometric sensor readings? For skin-contact sensors, ensure consistent, firm contact. Not painfully tight, mind you. Always calibrate your sensors in a genuinely neutral emotional state first. This baseline is non-negotiable for effective mood detection. Expecting reliable readings otherwise is unrealistic. Consider environmental factors like sudden temperature shifts affecting environmental sensors. Ambient noise can also corrupt data from external sensors. Details matter.
Here is an unspoken truth in mood-adaptive tech. Many makers believe sensors are 'plug and play.' Simple. The reality? These are sensitive scientific instruments. Your VibeWear's insight is only as sharp as the data it gets. Careful sensor placement and meticulous calibration are the uncelebrated champions of accurate moodwear. Master these for true signal quality.
The Shattered Canvas: Protecting Your E-Ink Display from DIY Disasters
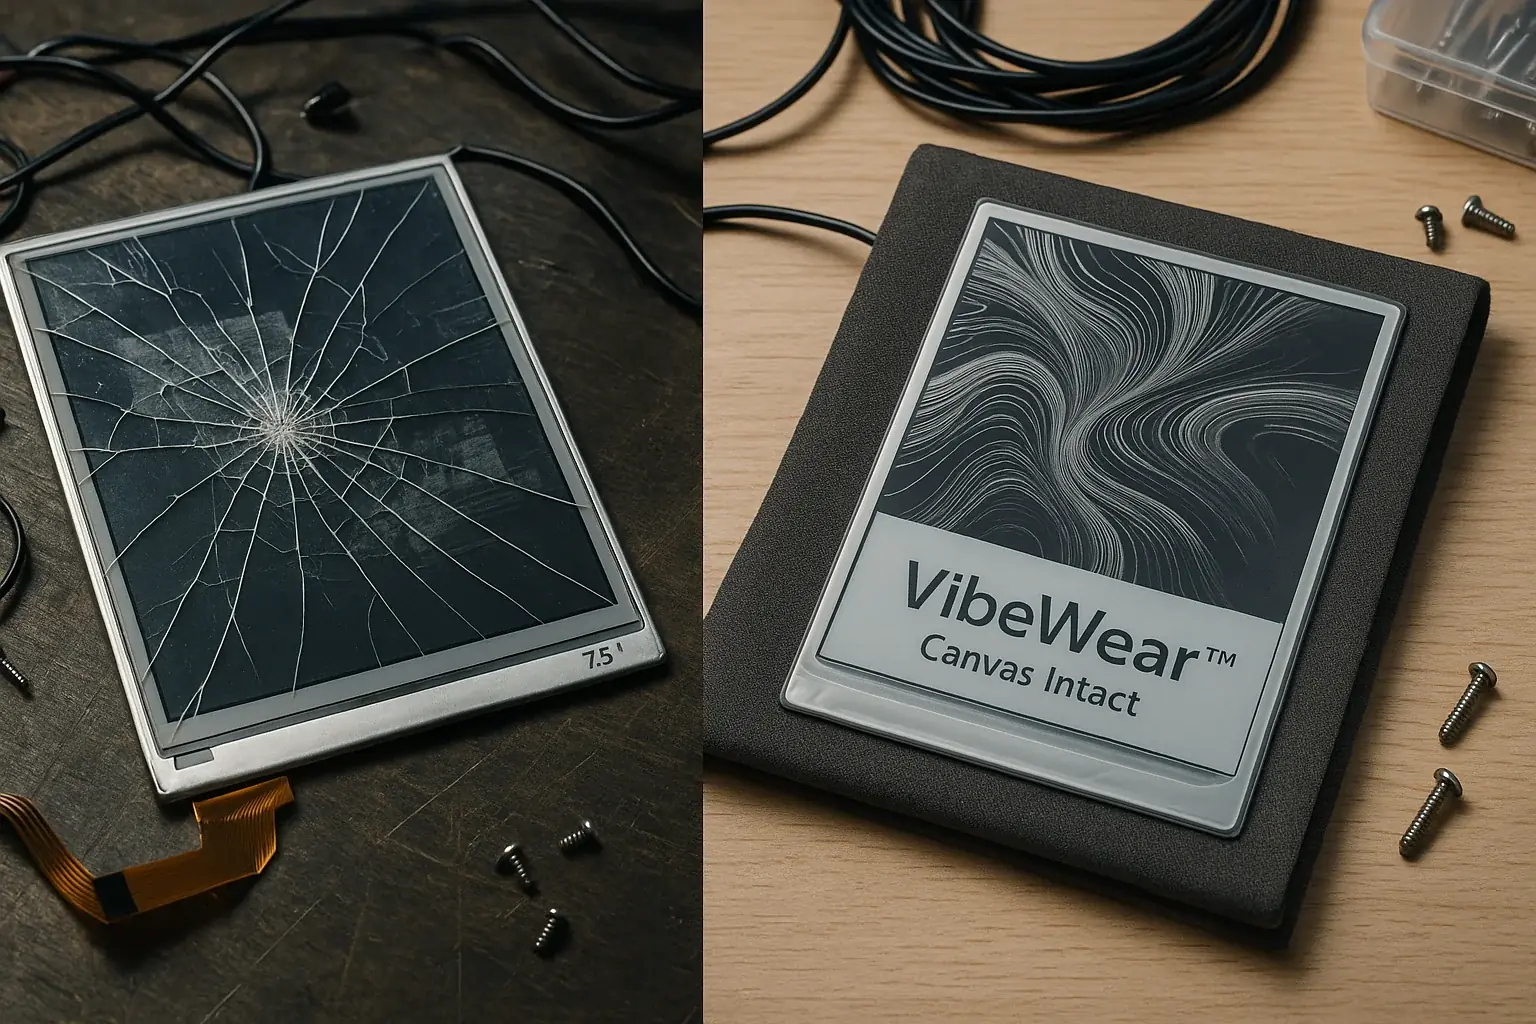
One wrong bend. A tiny drop. Even a static shock. Your dynamic E-Ink canvas can become a static brick. E-Ink displays are incredible. They are also surprisingly fragile during DIY assembly. Physical impacts or extreme flexing often cause irreparable harm. Makers learn this lesson the hard way. Too often.
Imagine carefully soldering your components. Then, you accidentally press too hard on the delicate screen. A faint, spiderweb crack appears. Disaster. Or perhaps you forget to ground yourself, zapping the sensitive driver board with static. Pressure, sharp bends, static electricity, and water exposure are primary threats to your display's life.
Always handle E-Ink displays by their edges. Gently. Avoid sharp creases or excessive pressure during integration into fabric. This is critical. Use anti-static mats and wrist straps when working near the driver board. Essential tools. For washability, proper encapsulation of the display and electronics is non-negotiable. Consider protective layers early in your design process.
E-Ink is not like your resilient smartphone screen. Far from it. It is a delicate dance of microscopic, charged capsules. The 'secret' to a long-lasting VibeWear display? Patience. Meticulous handling is key. Treat it like the precious, dynamic art canvas it truly is. Your care will be rewarded with a stunning, expressive garment.
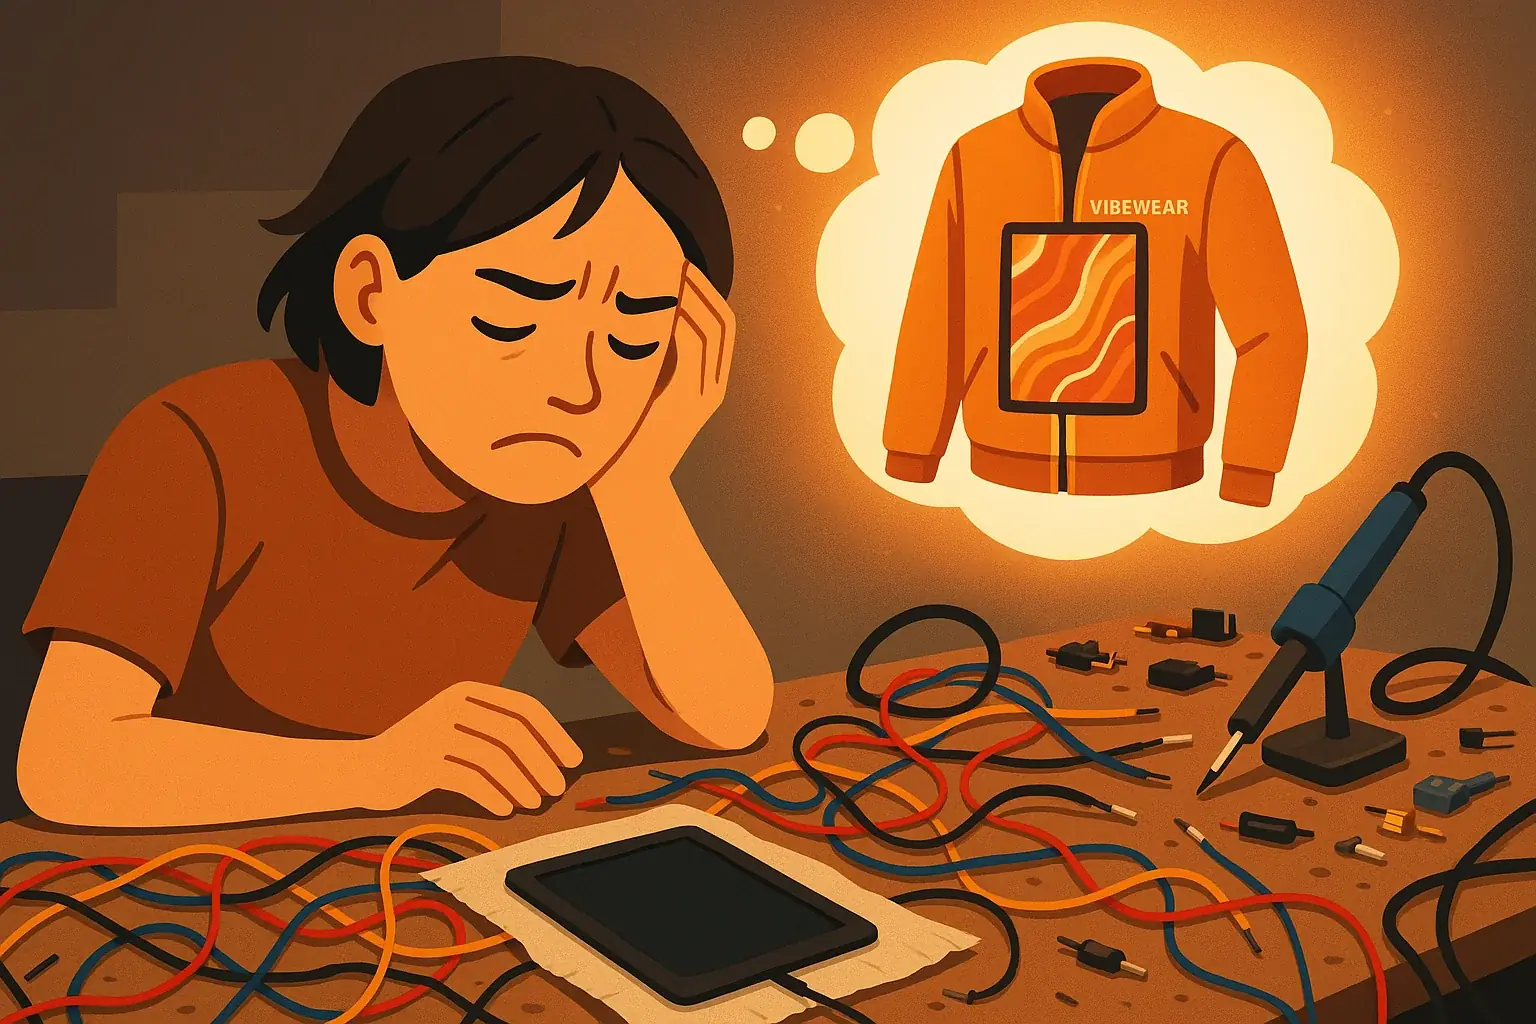
The Glitch in the Matrix: Debugging Your VibeWear Code (and Why It's Not Always Your Fault!)
Your VibeWear code runs. The display shows gibberish. Or it freezes. Coding bugs are frustrating. But here is good news. They are a normal part of your maker journey. These issues are rarely your 'fault' in the grand scheme. Even seasoned developers encounter them.
Many makers face common coding pitfalls with wearables. Imagine spending hours on complex sensor logic. Then, a tiny 'off-by-one' error in a loop crashes everything. Or a subtle library conflict, one you did not know existed, halts progress. Logic errors in Arduino IDE or MicroPython often misinterpret sensor data. Microcontroller memory limitations can cause unexpected crashes. Timing issues in your code create unpredictable E-Ink display behavior. Library incompatibilities frequently frustrate VibeWear creators.
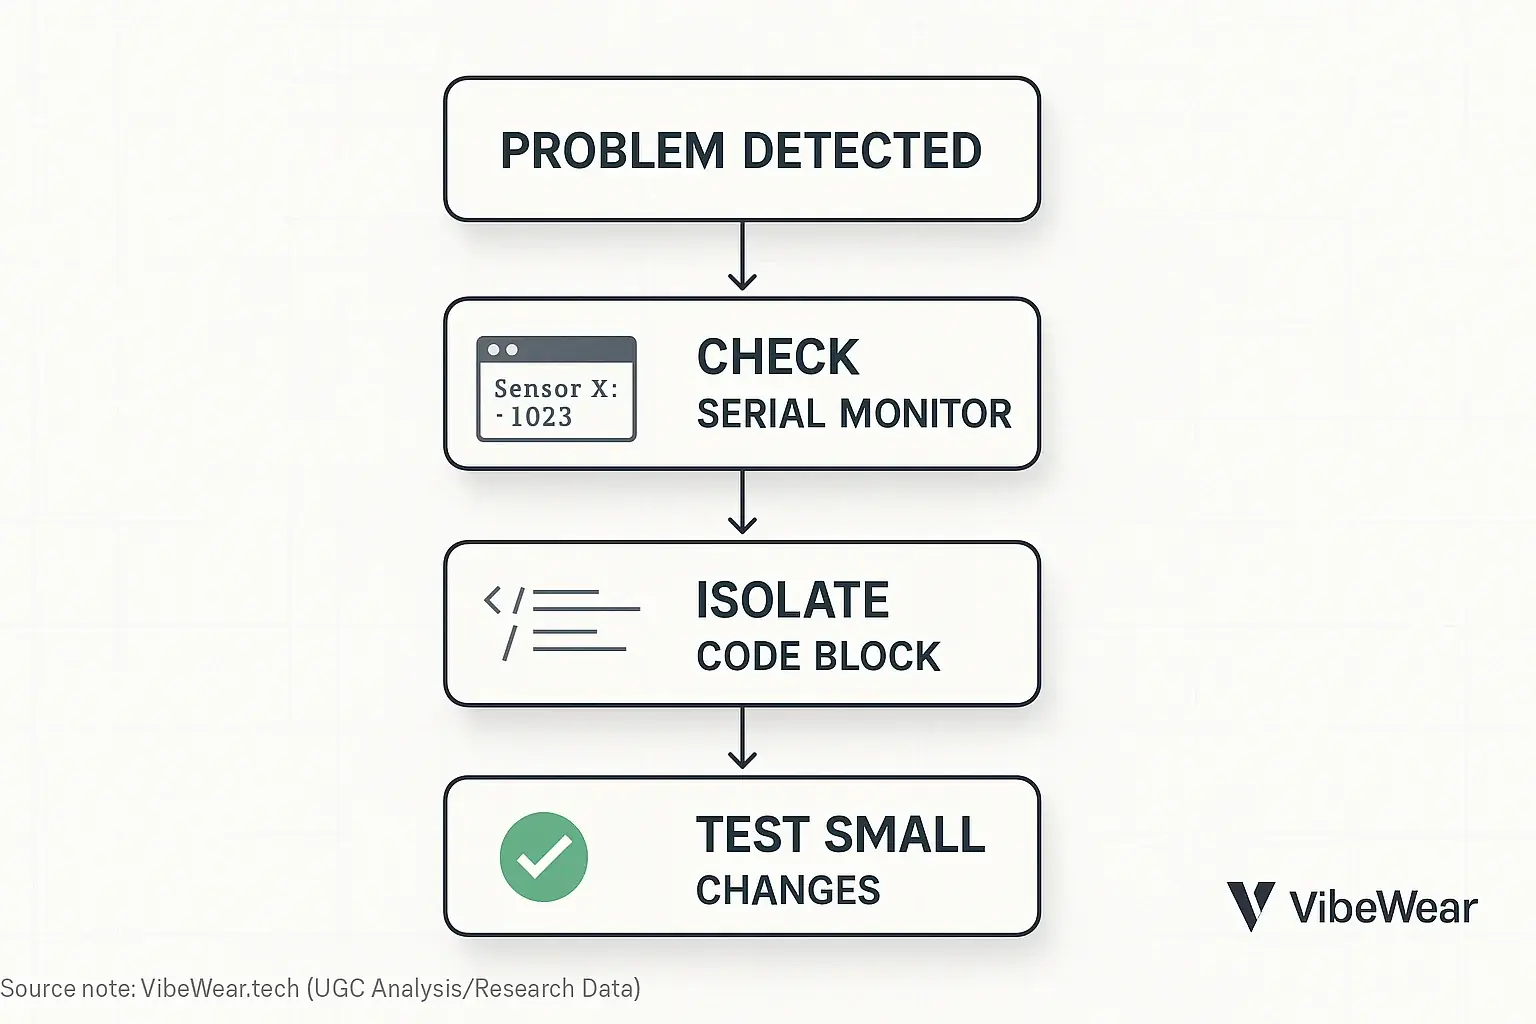
Your best friend for debugging is the serial monitor. Print everything. Seriously. Isolate problematic code blocks. Comment out sections carefully. Test small changes incrementally. This builds confidence. Learn to interpret error messages from the compiler. They are clues. Not accusations.
VibeWear research reveals an unspoken truth about coding. Debugging is not about being 'smart enough' to avoid all bugs. It is about being a persistent detective. The real 'secret' is systematic elimination. Every bug you fix makes you a stronger maker. Your VibeWear project also becomes more robust and reliable.
Is Your VibeWear Dream Too Big? Assess Your Project's Scope
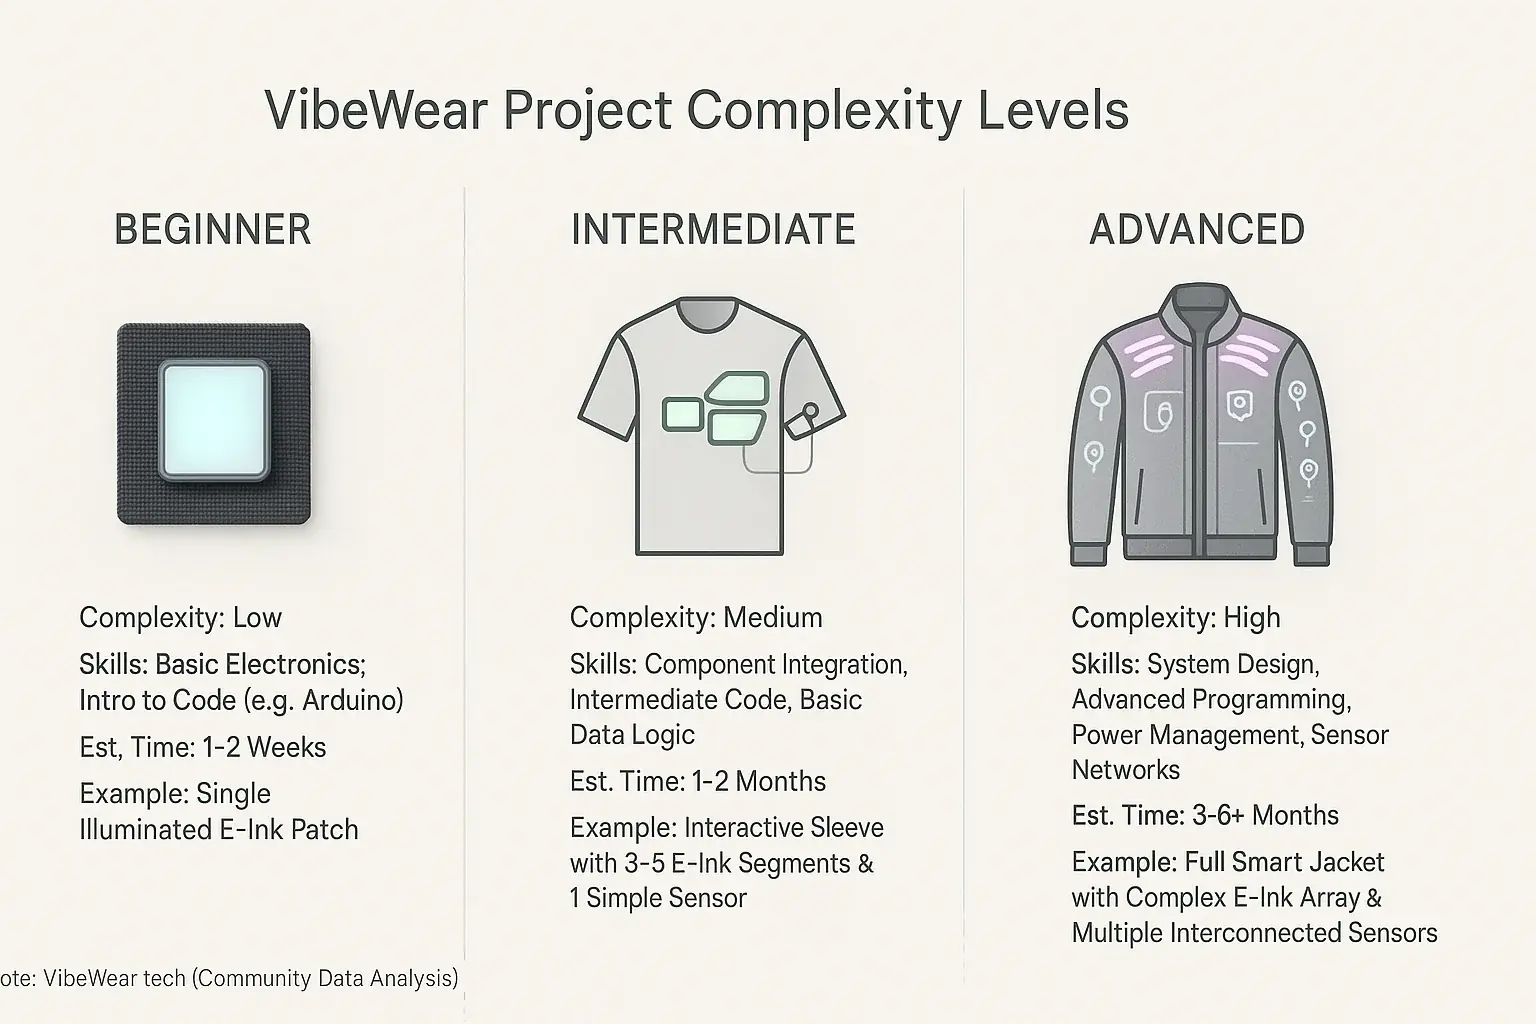
Assess Your VibeWear Project Ambition
Answer a few quick questions to see if your project scope aligns with your current skill level. Be honest!
1. Does your project involve multiple E-Ink panels working together?
2. Will your project require real-time mood or complex environmental detection?
3. Are you new to electronics, soldering, or microcontroller programming?
Your VibeWear Project Scope needs careful thought; overambition often derails first projects, a common pitfall. Imagine the satisfaction of a simple, glowing E-Ink patch, complete—a stark contrast to an unfinished, ambitious jacket’s frustration. Experts started simple. This approach builds crucial skills and prevents that initial burnout VibeWear helps you sidestep.
Iterative development unlocks VibeWear project mastery. Each small success powerfully builds your confidence for more complex designs. Think of every finished piece as a crucial stepping stone. Share your scaled-down VibeWear triumphs! This journey is how skills grow; VibeWear champions this rewarding process.
Mastering the Vibe: Learning from Mistakes & Building Better
Every VibeWear project that flickers, frays, or refuses to boot is a lesson waiting to be learned. Think of each 'pitfall' as a hidden tutorial. This tutorial sharpens your skills. Persistence is the maker's superpower.
The VibeWear journey is collaborative. Share your challenges in maker communities. You will find countless peers ready to help. Every problem solved builds your expertise. Each connection secured enhances it further.
Your hands shape expressive fashion's future. Keep experimenting. Keep learning. And keep vibing. We cannot wait to see what you build next.